iPhone Screen Replacement Kit and Step-by-Step Guide for Technicians
17 November 2026 · LightspeedTools team
Short answer: To replace an iPhone screen, power the phone off, remove the two bottom pentalobe screws, warm the edge to soften the adhesive, lift the display with a suction cup and thin picks, and disconnect the battery before you touch any display connector. Transfer any parts the old screen carries, test the new screen before sealing, then fit fresh adhesive. The exact opening direction and the parts you move differ by model, so check the generation before you start.
What goes in an iPhone screen replacement kit
A good iPhone screen replacement kit is less about the number of pieces and more about having the right tool for each stage. For a bench that does screens every day, put together:
- Screwdrivers: pentalobe P2 for the bottom screws, tri-point Y000 for internal brackets on iPhone 7 and later, Phillips #000 for older models and some shields. Precision drivers with hardened tips from our screwdriver range last far longer than kit drivers.
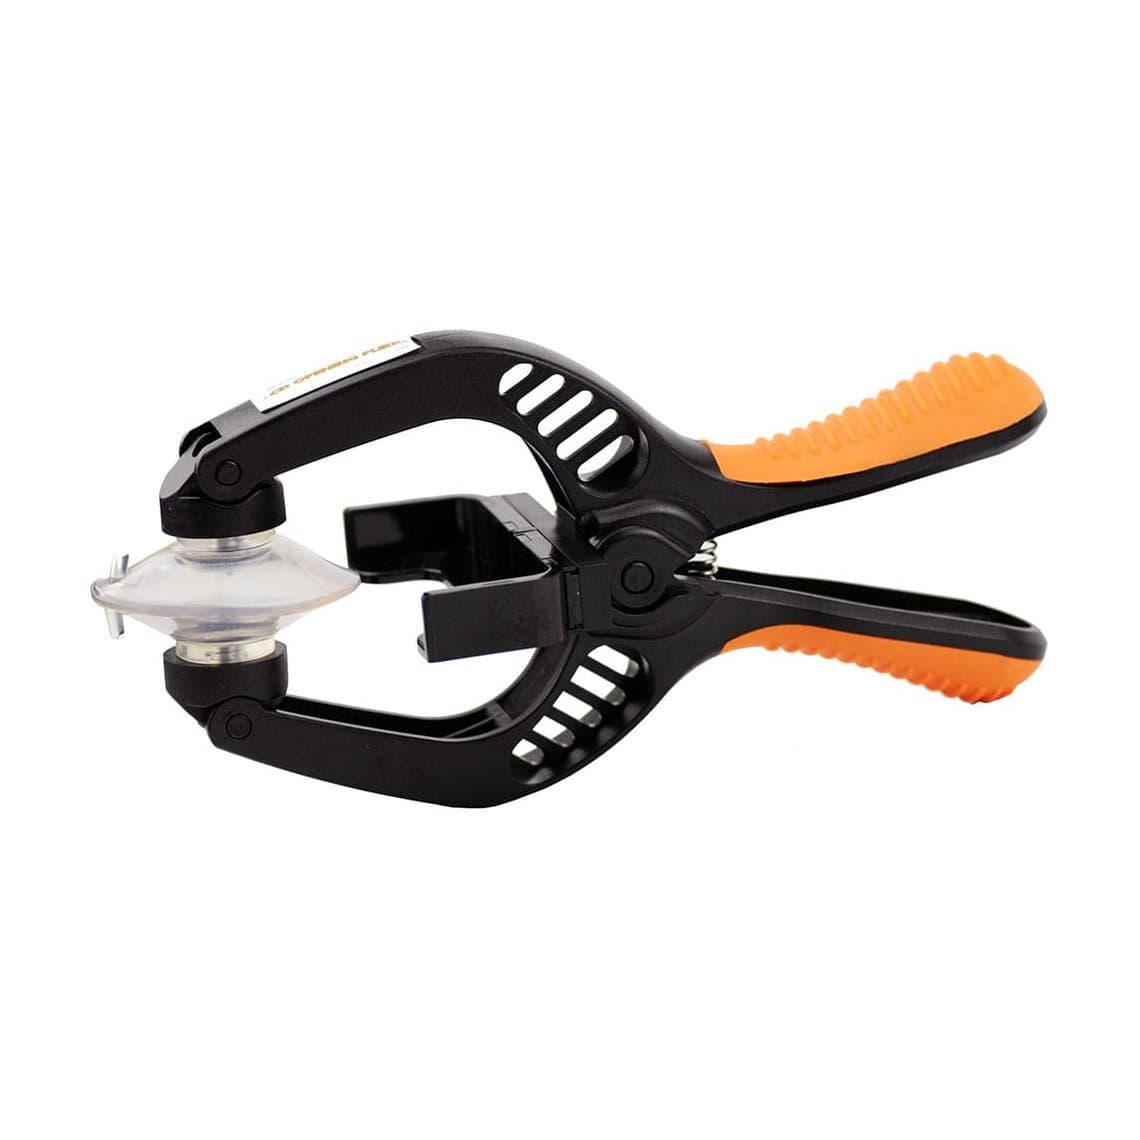
- Suction and lifting: a suction cup or opening plier such as the Jakemy JM-OP05 opening plier gives a steady, even pull without bending the screen.
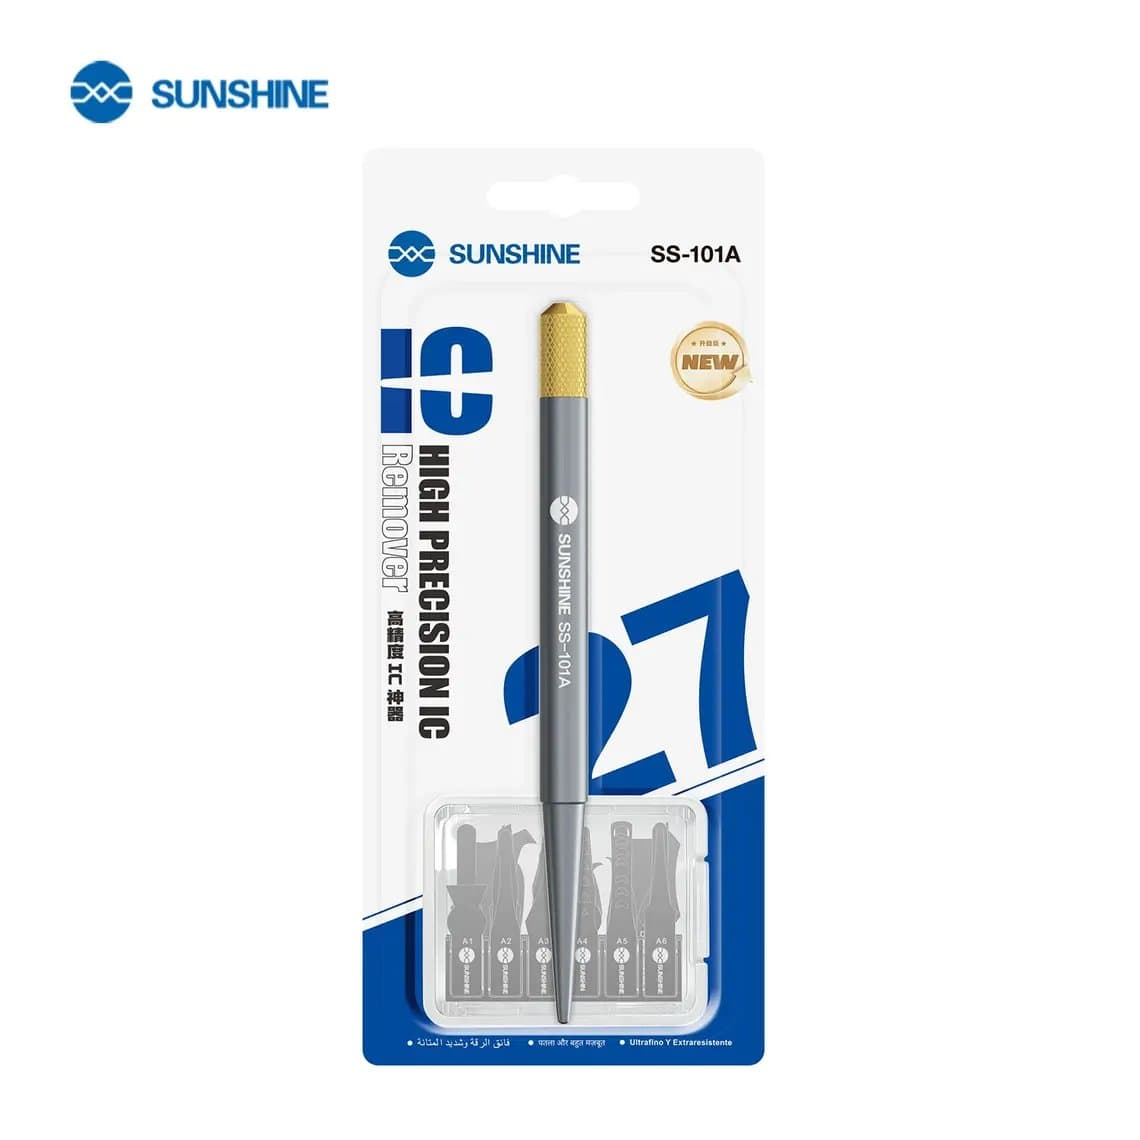
- Picks and cards: a thin blade like the SS-101A ultra-thin opening card to start the gap, plus wider plastic picks to slice around the edge.
- Spudgers: non-conductive tools such as the plastic spudger set for battery and display connectors. Never use metal near a live connector.
- Heat: a heating pad or hot plate to soften the frame adhesive evenly. See our heating pads.
- Adhesive and ESD: model-specific pre-cut adhesive, an anti-static mat and wrist strap, and a magnetic screw mat.
If you prefer one box rather than building a set, a combined kit like the BST-115 15-in-1 screen opening kit covers the opening stage. Our full selection of screen opening tools is grouped by task.
Before you open: prep checklist
- Confirm the fault. Check touch, display, Face ID or Touch ID, earpiece and proximity, and note anything already faulty.
- Check the battery. If the back is lifting or the screen is pushed up, the battery may be swollen. Do not press on it or heat it. Remove a swollen battery carefully first or refer the job on.
- Match the part. Compare the new screen with the model and colour. Front camera cut-outs, flex positions and frame sizes differ between models that look almost identical.
- Read True Tone data if needed. On supported models, a programmer can read the original screen's data before you remove it, so you can write it to the new one later.
- Power off and tape cracked glass. Packing tape over shattered glass stops shards and gives the suction cup something to grip.
Opening direction differs by model
This is where many first-time repairs go wrong. On most iPhones the display is lifted from the bottom edge first, then swung open like a book, with the display flex cables running along one side. If you pull it the wrong way, you tear those cables.
| Generation | How it opens | Notes |
|---|---|---|
| iPhone 6s and earlier | Lift from the bottom, hinge upward from the top edge | Display cables sit at the top. Less adhesive, little heat needed. |
| iPhone 7 and 8 series, SE 2nd/3rd gen | Lift from the bottom, open like a book to the right | Water-resistant adhesive and clips along the top edge. Slide the screen down slightly before opening. |
| iPhone X to 13 series | Lift from the bottom, open like a book to the right | Stronger adhesive, more heat. Flex cables on the right side of the frame. |
| Recent base models (from iPhone 14 onward) | Varies | Apple changed the internal design of base models so the back glass can also be removed. The display route and cable position may differ from Pro models of the same year, so check the guide for that exact model. |
When in doubt, open the screen only a few millimetres and look for the cable side before you commit.
Step-by-step: removing the old screen
1. Remove the bottom screws
Take out the two pentalobe screws either side of the charging port. On some models they are different lengths, so keep them in order.
2. Apply heat
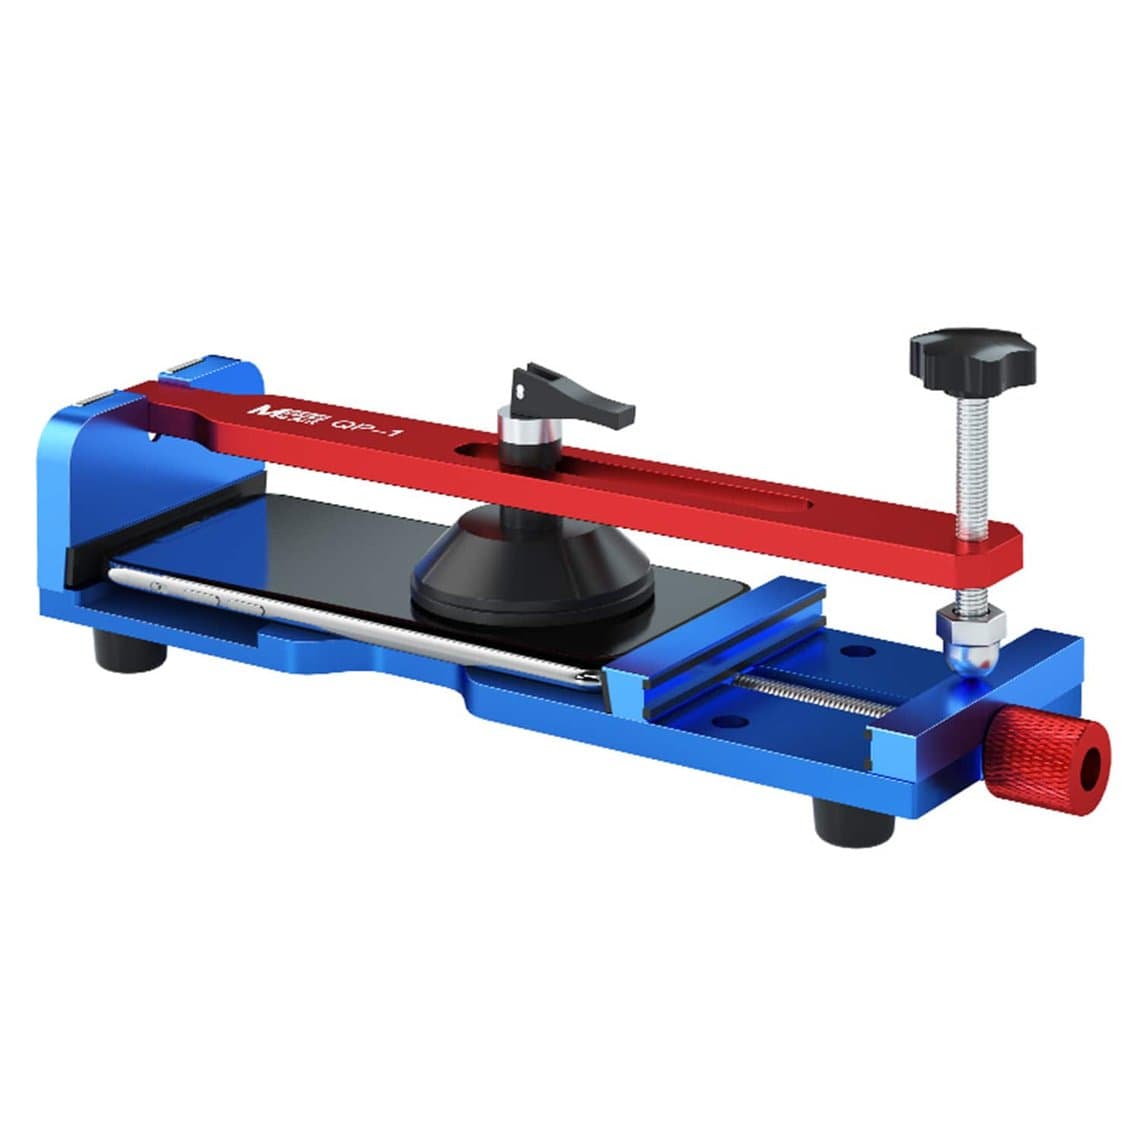
Warm the bottom edge, or the whole display, for one to two minutes. The aim is warm to the touch, not hot. Too much heat can damage the OLED, swell the battery or warp the frame. Heat-free fixtures such as the Maant QP-1 screen removal fixture are an option for shops that want to avoid heating near the battery.
3. Create a gap
Place the suction cup just above the bottom edge, pull with steady force and slide a thin card into the gap. Keep the blade shallow, around two to three millimetres. Pushing deep cuts the display flex or damages the panel edge.
4. Cut the adhesive
Slide the pick around the bottom corners and up the sides. Go carefully along the top: there are clips on most models and the front camera and sensors sit just behind the glass. Leave the cable side until last.
5. Open, but do not pull
Swing the display open in the correct direction and rest it against something, such as a box, so the cables are not strained.
6. Disconnect the battery first
Remove the bracket over the connectors and disconnect the battery before any display connector. Plugging or unplugging a display flex with the battery connected can damage the backlight circuit or the display's power lines. Skipping it is a common cause of "new screen does not work" returns.
7. Disconnect the display flex cables
Lift each connector straight up with a plastic spudger. Depending on the model there are two or three: display, digitizer and front sensor assembly. Note which goes where.
Transferring parts: older models vs newer models
What you move from the old screen to the new one depends heavily on the generation.
- iPhone 6 to 8 series: the front camera and sensor cable, earpiece and its bracket, and the metal back plate are usually transferred. On models with a home button, the home button must be moved to the new screen, because Touch ID is paired to the logic board. A replacement button will press but will not unlock with a fingerprint.
- iPhone X to 11 series: the earpiece speaker and the sensor flex (proximity and ambient light, and on Face ID models the flood illuminator) sit on the back of the screen and need transferring. Handle this flex with extreme care. Tearing it can disable Face ID permanently. Some LCD screens, such as the iPhone 11, may also need a shield plate fitted; a spare iPhone 11 LCD shield plate saves a job if the old one is bent.
- iPhone 12 and later: the earpiece and front sensors moved off the display into the frame, so on most of these models the screen swaps without part transfer. Always compare the new and old screen before fitting, as some replacement screens come without small brackets.
Work slowly with transfers, and use a microscope to check that small flex cables are flat and undamaged before you reconnect them.
Test before you seal
Connect the new display, then the battery, and power on with the screen resting in place. Check:
- Brightness at minimum and maximum, colour on white and grey backgrounds, and no lines or blotches.
- Touch across the whole surface, including corners and the keyboard area. Drag an app icon around the screen to find dead spots.
- Face ID or Touch ID, proximity (the screen should turn off during a call near your ear), auto-brightness and the earpiece.
- Front camera and, where fitted, True Tone after programming.
For high volumes, screen testers let you check screens before they ever go into a customer phone. Then disconnect the battery again before you reconnect anything you moved.
Fitting the new adhesive and closing
Remove every trace of old adhesive from the frame. Leftover glue is the most common reason a new screen sits proud or lifts at one corner. Clean with isopropyl alcohol and let it dry. Apply the pre-cut adhesive, peel the liner, and on models that use them, fit any waterproof stickers or seals, for example an iPhone 12 series screen waterproof sticker.
Reconnect everything, refit brackets with the correct screws (a long screw in a short hole can damage the board), connect the battery last, and close the screen top edge first. Press evenly for several minutes. Water resistance after a repair cannot be guaranteed, even with new adhesive.
True Tone and the "Unknown part" notice
True Tone uses calibration data linked to the original screen. On a replacement it is usually missing unless you transfer the data with a programmer, which works on supported models. Our True Tone programmers are listed by repair type.
Recent iPhones also show an "Unknown part" message in Settings after a non-Apple screen is fitted. It is a notice, not a fault: the screen still works. Tell customers in advance.
Choosing the right screen grade
Grade affects colour, brightness, thickness and power use:
- Original New and Original Refurb: closest to factory behaviour, 12-month warranty.
- Original Pull: genuine panels removed from other phones, 6 months.
- Premium Soft OLED: flexible OLED, close to original, 12 months.
- Hard OLED: rigid OLED, good value, 6 months.
- Incell: LCD-based, lowest cost, thicker and more power-hungry on OLED models, 3 months.
Our quality grades guide explains the differences in detail. For an OLED model such as the iPhone 13 Pro OLED screen assembly, the grade you choose is the main factor in how the finished phone looks next to an untouched one.
Common mistakes to avoid
- Opening in the wrong direction and tearing the display flex.
- Prying deep with metal tools and cutting cables or chipping the OLED edge.
- Connecting a display with the battery still connected.
- Skipping the test and gluing a faulty screen down.
- Forgetting to transfer the earpiece mesh, sensor flex or home button on older models.
Questions
How long does an iPhone screen replacement take?
An experienced technician can usually replace a screen on a newer model in under an hour. Older models with part transfers, or phones with bent frames, take longer.
Do I need to disconnect the battery to replace an iPhone screen?
Yes. Disconnect the battery before you unplug or plug in any display cable. Skipping it can damage the new screen or the logic board.
Will Face ID work after a screen replacement?
Face ID should keep working if the Face ID components are not damaged. On iPhone X to 11 series, part of the sensor assembly is on the back of the screen and must be transferred carefully. On iPhone 12 and later these parts sit in the frame, so a screen swap does not usually affect them.
Why does my iPhone say "Unknown part" after a new screen?
Recent iPhones show this notice whenever a screen that Apple did not install is detected. The screen still works normally. True Tone can be restored with a programmer on supported models, but the notice itself is part of iOS.
Browse our iPhone screens by model and grade, including LCD options such as the iPhone 11 LCD assembly. Shops buying regularly can unlock trade pricing through wholesale, and repeat orders are fastest with Quick Order by SKU or CSV.